GeoJSON & Git
Moving into the web means new requirements and standards to represent your data. Instead of an excel spreadsheet on your desktop or a shapefile in your GIS, we need something more properly formatted for the languages available to the web. Enter JSON - JavaScript Object Notation, a key-value format for data that is recognized and iterated through via JavaScript (the language that powers our web mapping libraries).
var myData = {
  "key": "value",
  "anotherKey": "another value"
}
This JavaScript object, called myData is accessed through a dot-syntax chain such as:
myData.key // value
myData.anotherKey // another value
GeoJSON
GeoJSON, as you’d guess, is an extension of the JSON format. This new format adds standard keys and values to properly represent geographic data. The GeoJSON specification includes three important keys, type, geometry, and properties. Type determines the type of object, typically involving multi-polygons or single features, or collections. Geometry denotes the referenced data nodes. The example below is a point. If you are making a line, you’d have an array of points instead of one. Finally, properties are essentially your metadata. These can be as long as you like, and are used to reference information about the geographic object.
{
  "type": "Feature",
  "geometry": {
    "type": "Point",
    "coordinates": [-122.3331, 47.6097]
  },
  "properties": {
    "name": "Maptime Seattle",
    "lesson": "Git & GeoJSON"
  }
}
GeoJSON is loved by mapping libraries. It represents a much needed standardization in our geographic data. This is especially important if you want the web to interact with geographic information consistently across different mapping libraries and different browsers. There’s a really great tool, GeoJSON.io, that visualizes the editing of a GeoJSON. We’ll be using this tool later in this tutorial!
Git
One of the most powerful tools in developing code-heavy projects can be coordination. Understanding where issues exist, what work has been done and who has done it is incredibly important. Take your standard workflow: you create new files, add text in those files, change text in those files, maybe remove some files, combine files, re-edit files, and so forth. On a particular file, you change the title, but a week later you change the title again. In your standard workflow anything before your newest file is technically gone, absent from history because you have simply overwritten changes. Now add 10 other people who are editing this document. They change not only the title, but add new paragraphs, edit your work, and remove much of what you had previously written. In this scenario - the current document of edits is the only document. There is no going back, unless you saved other files, but to see changes you’d have to search manually.
This is where Git comes into play.
Think of Git as a way to track all of those key edits in history - a means of delegating ownership to specific changes - something that allows you and your team to incorporate new changes upon approval or to roll back changes to previous versions if necessary.
Github
Github is a company that provides a visual interface for consuming and representing all things Git. It allows you to create homes for projects that you can update from your computer, and others can see those changes take effect, and make changes accordingly. It also gives a great issue tracking system and provides great ways to merge two versions of a project into one by checking for conflicts and errors.
Fork > Edit > Commit > Pull
This is a standard workflow in Git, and particularly in Github. Though there are many ways you can contribute to a project, we’ll talk about and attempt this one in particular.
Forking a branch essentially makes a clone of someone’s repository as your own, allowing you to make your own edits and changes. This is great because you don’t have to change someone elses work while extending your own. Note: you can’t simply edit anyone’s files on github without their approval.
Edit your files, add a file, make any changes you want. Really!
Commit the changes and additions you’ve made into an organized node of changes. For instance, you’ve made all of the changes necessary to fix issue #314 - now let’s commit all of these changes into a nicely organized basket of updates related to that issue. Essentially, this is the organization of your code.
Pulling means you want to pull changes into another repository, with the idea that you are updating it. In the fork method, we’re assuming you do not have permission to merge your changes into the main project, so you what you do is called making a pull request to those who do have permission. They can ensure the changes are good, and will merge your changes into the specified project. So, you make a request for them to pull your changes into the main repository of code. A pull request!
Git: Friends with GeoJSON
Github has incorporated a great feature into their system that visualizes specific types of geographic data including all geojson files - essentially any file with the extension filename.geojson. This can be a super useful way to view your data without needing to make your own webmap. This is what we’re going to do today.
Tutorial Time!
Today we’re going to apply the above “Fork & Pull” workflow to a MaptimeSEA repository with your own github account. We’ll create a new GeoJSON file using geojson.io and add that file to your newly forked repository. Finally, you will perform a pull request for someone to approve and merge your file into the MaptimeSEA repository. Everything below assumes you have created an account on Github. If not, head over to github.com and set one up!
STEP 1: Fork repository
First, head over to github.com/maptimesea/geojson and take a look at the repository. You’ll see a few things: some files, many of them with the .geojson extension (there they are!), these instructions will be listed below (those are located in the README.md file), and there are some action buttons on the top right and right sidebar, this is where we’ll start.
Press the Fork button to begin cloning the repository under your username. You should see some fun gifs, and then the page will refresh under your own repository. The repository name should now have your username, and a reference to the original repository from which you forked. That’s a fork!
STEP 2: Make a GeoJSON
Now head to geojson.io where we’ll make our geojson. Here you’ll see a visual editor with some tools on the right side of the map that allow you to create polygons, lines, and points. You can use those tools to click and edit your geojson - which you’ll see populate on the right-hand side.
If you click on the element you’ve created, you can add new properties, which will populate as key value pairs in the properties key of the geojson on the right. Add some metadata here to make the data unique.
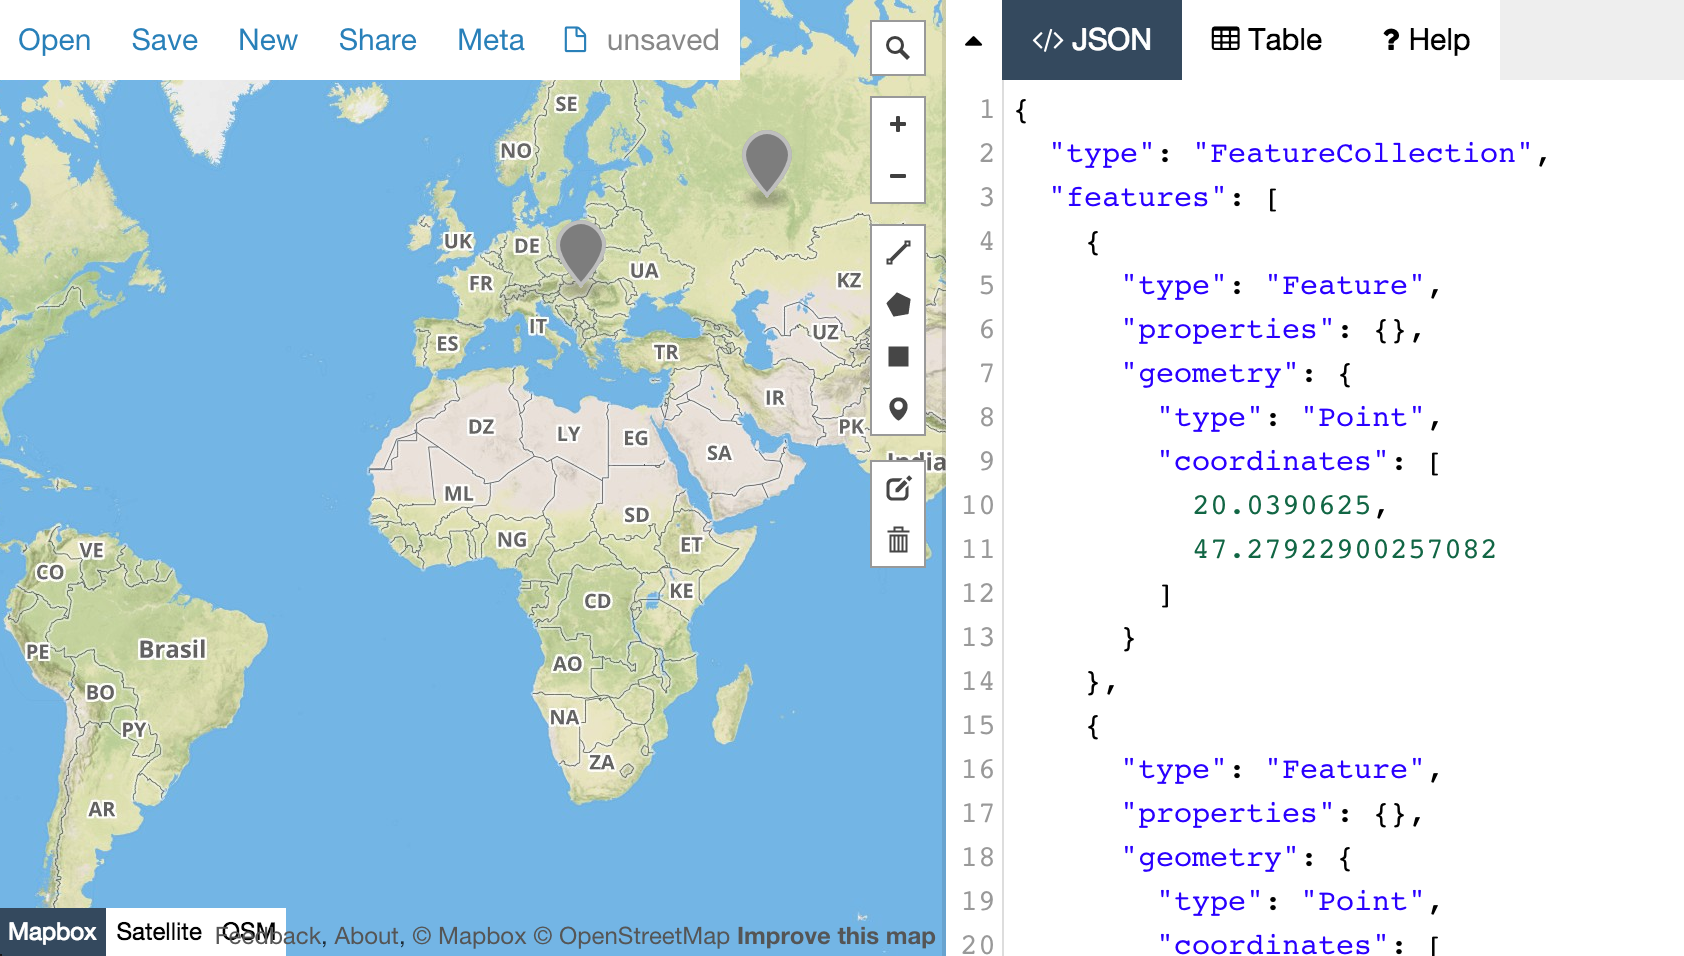
You’ll want to copy and paste the final geojson code from geojson.io for this step.
STEP 3: Add new file
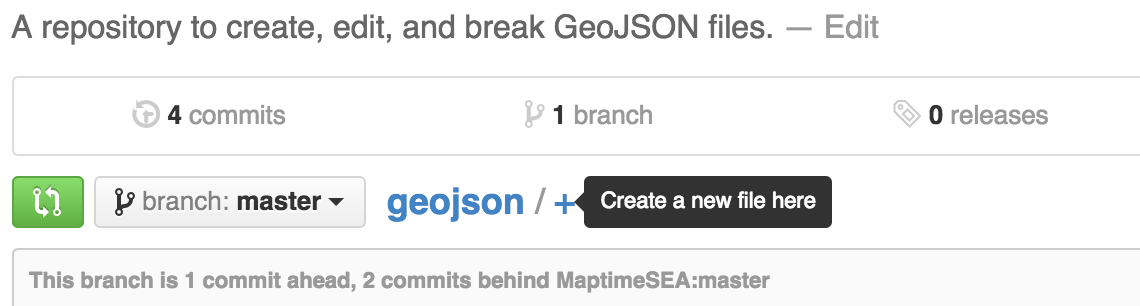
Head back to your forked repository and look for the section denoting the “branch” and the name of the repository “geojson”. Notice the + sign… click that to make a new file.
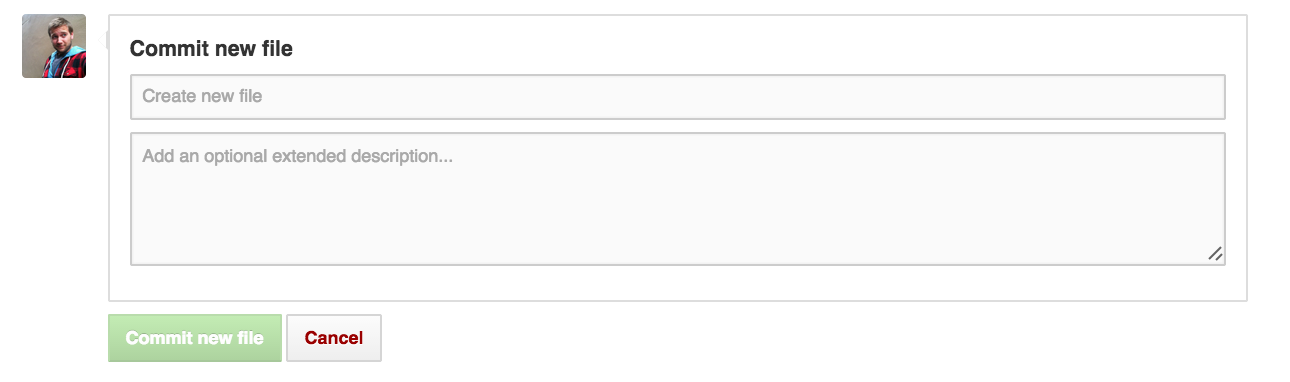
A new page will open up with a few fields to fill out. First, name your file however you like but make sure it ends with .geojson as a file type to ensure Github recognizes it as such. Paste your geojson code into the editor on the screen and scroll down to the bottom.
STEP 4: Commit new file
You’ll see two fields here, a commit message and a description. Make the commit message whatever you like, and fill out the description if you want, but it’s not required. Press Commit new file and watch the magic! You’ll be redirected back to your forked repository’s page and will notice a new file there. If you click that file name a new page will open and your screen will begin generating a visual representation of your GeoJSON file.
STEP 5: Make a pull request
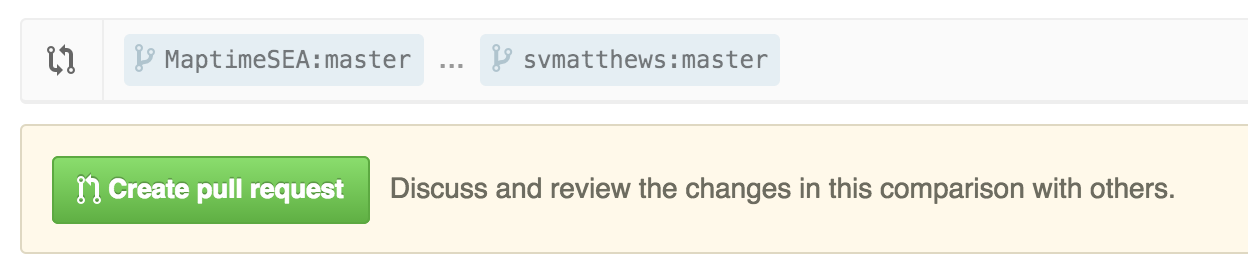
If you are seeing your new file show up, you’ve successfully created a GeoJSON and added to your forked repository. Nice work! Next step is to take those changes you have made, and merge them into MaptimeSEA’s geojson repository, from where you originally forked. To do this, make sure you are on your repository’s page and look for the green button with the pull request symbol. *It’s to the left of the select button that says “branch: master”.

Press the button to begin the pull request. You’ll see a new page essentially listing out the changes you’ve made with a button to officially create the pull request, which will send a notification to the MaptimeSEA repository owner. Create your pull request, and await the repository’s owner. The owner will either automatically merge your changes, or comment on your pull request with changes that are required before your new work can be merged.
Once your changes have been merged, you will officially be a contributor to the MaptimeSEA/geojson repository! Wahoo!
Fin.
Hope that was helpful! Please fill out our survey when you are done even if you couldn’t attend the meeting. We want to make sure the MaptimeSEA tutorials are teaching what you want to learn. bit.ly/maptimesea_survey